
Promoting your band
should be easy as pie in these days of the Internet
explosion. Never before have musicians had this kind of access to a
vast, global audience with so few intermediaries. But to promote your
band on the Net, these days it is not enough to have just a recording
of your music. With the entry into the game of user-content driven
media hubs like MySpace and YouTube it has become more and more
important for a band to have a music video as part of the suite of
on-line offerings that make up their web presence.
In this environment the Auckland reggae duo Bongo Nation produced their EP ‘Good Vibration’ on their own - recordings, music videos and web presence (website, MySpace, YouTube) - using an off-the-shelf Mac laptop computer and software downloaded from the Internet.
The Bongo Nation project had grown out of a passionate interest in classic Jamaican roots reggae and dub, with a particular focus on bass riddims and Nyabingi hand drumming. With a growing repertoire of original songs to promote but only a shoestring budget to spend on web promotion, we decided to produce as much of the media required ourselves.
We first recorded the four tracks for our EP in our rehearsal studio, using an Apple G4 iBook laptop running Ableton Live5 music production software. We used an M-Audio Ozone USB digital audio interface to plug in a Shure KSM27 studio microphone or electric instruments like a Fender Squier Jazz bass or an old Yamaha YC20 electric organ. Dub effects and vocal processing were all done in Live5. When mixing and mastering we also made good use of a VST plug-in compressor called the “Vintage Warmer” from PSP Software (we had to pay for that download).
Mastering the tracks for the ‘Good Vibration’ EP was an iterative process guided by trial and error. We used different combinations of equalisation and compression to massage the audio in our mixes and make them sound just right. Then we used the Apple iTunes software (free with the laptop) to burn our attempts to CD so that we could listen to them on other equipment and compare them to tracks that we were familiar with. It took us several weeks in fact (and a lot of driving – the car stereo was a great arbiter!) before the masters sounded right, with no more burr in the speakers from untamed low end, even at party volumes.
We also used the iTunes software to burn the final masters of the four EP tracks on to blank all-white CDs. We then printed the CD artwork made with an inexpensive software package called Discus straight onto the white CDs using an Epson Stylus Photo R210 USB colour printer.
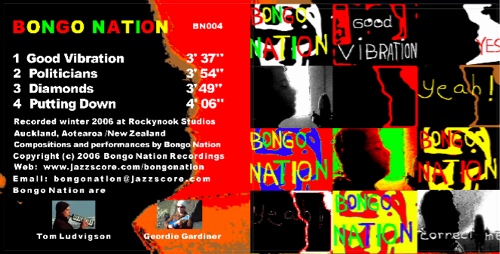
The artwork for CD case inserts and printing on the CDs was also developed using the Discus software. With this we brought together a collage of still frames from the ‘Good Vibration’ video with track names and Bongo Nation contact information, and then used an inexpensive Brother DCP-110C USB ink jet colour printer to print CD inserts on glossy photographic paper straight from the laptop.
In this environment the Auckland reggae duo Bongo Nation produced their EP ‘Good Vibration’ on their own - recordings, music videos and web presence (website, MySpace, YouTube) - using an off-the-shelf Mac laptop computer and software downloaded from the Internet.
The Bongo Nation project had grown out of a passionate interest in classic Jamaican roots reggae and dub, with a particular focus on bass riddims and Nyabingi hand drumming. With a growing repertoire of original songs to promote but only a shoestring budget to spend on web promotion, we decided to produce as much of the media required ourselves.
We first recorded the four tracks for our EP in our rehearsal studio, using an Apple G4 iBook laptop running Ableton Live5 music production software. We used an M-Audio Ozone USB digital audio interface to plug in a Shure KSM27 studio microphone or electric instruments like a Fender Squier Jazz bass or an old Yamaha YC20 electric organ. Dub effects and vocal processing were all done in Live5. When mixing and mastering we also made good use of a VST plug-in compressor called the “Vintage Warmer” from PSP Software (we had to pay for that download).
Mastering the tracks for the ‘Good Vibration’ EP was an iterative process guided by trial and error. We used different combinations of equalisation and compression to massage the audio in our mixes and make them sound just right. Then we used the Apple iTunes software (free with the laptop) to burn our attempts to CD so that we could listen to them on other equipment and compare them to tracks that we were familiar with. It took us several weeks in fact (and a lot of driving – the car stereo was a great arbiter!) before the masters sounded right, with no more burr in the speakers from untamed low end, even at party volumes.
We also used the iTunes software to burn the final masters of the four EP tracks on to blank all-white CDs. We then printed the CD artwork made with an inexpensive software package called Discus straight onto the white CDs using an Epson Stylus Photo R210 USB colour printer.
The artwork for CD case inserts and printing on the CDs was also developed using the Discus software. With this we brought together a collage of still frames from the ‘Good Vibration’ video with track names and Bongo Nation contact information, and then used an inexpensive Brother DCP-110C USB ink jet colour printer to print CD inserts on glossy photographic paper straight from the laptop.
We made videos for two
or the tracks on the EP: ‘Good
Vibration’ and ‘Diamonds’, using a JVC
Everio Hard Drive Camcorder. It has a built-in 30 GB hard-drive - you
simply connect it to the laptop with a USB cable and your footage is
instantly available for use, just a drag-and-drop away. We videoed each
other playing and miming vocals along with our finished recordings of
the tracks, so that the footage would fit with the recordings on our
EP. We then edited the footage on the iBook using Apple’s
iMovie HD software (that also came with the laptop) with Cfx effects
plug-ins, and finally assembled the videos using HyperEngine AV
software downloaded free off the Web.
Digital video editing
was not all that hard to learn. It is a lot like dealing with audio -
if you have used multi-track music production software before, moving
on to video is not a big leap. You still have audio tracks with the now
familiar graphics of audio waveforms running from left to right on the
computer screen, but along with each audio track you also have a
separate video track, every second of which contains 25 frames or
picture ‘stills’ (this is a set frame rate using
the PAL video system).
The way you interact with the video tracks is very similar to working with multi-track audio. Playing, cueing and rewinding video is done using the same ‘tape transport’ controls that we have become used to from on-screen audio players (and iPods). As you listen to your music track you can watch what is going on the associated video track in a small on-screen window. A mouse click will take you to any point /frame along your track. You can zoom in to the level of individual frames or zoom out to see the entire track.
The video editing functions are also familiar - you can select, copy, cut and paste sections of video tracks into any order or arrangement that you like. You can also apply visual effects to selected sections of video – fade them in or out, cross fade between bits of video, or alter the look of sections of your video from subtle tinting to outrageous distortion. We decided to take a psychedelic approach and went overboard with old-school effects (this was a lot of fun!). Because of this there is no normal unprocessed footage in either the ‘Good Vibration’ or ‘Diamonds’ video clips - every tiny snippet of video that we used has been re-coloured or visually transformed (we especially liked the ‘Edge Work’ effect for turning video footage into abstract patterns in black and white, and ‘Movie Canvas’ for freehand writing and drawing on the screen!).
As we were working on the video clips we ran into some issues that were also familiar from working with audio, and we were pleased to discover that they yielded to familiar solutions or workarounds. One example was when using multiple bits of several different video ‘takes’ spread over many different tracks (in HyperEngine AV), and we had to make sure to place each bit of video in the correct place along the time line to keep the picture in perfect timing with the master music track at all times. We found that if we always kept a copy of the original audio recording from the live video take (muted) next to each bit of video on the laptop screen, we could use the on-screen graphics of the audio waveforms to visually line up each bit of video in accurate sync with the master audio track.
The outcome of all this intensive activity centred on a laptop and a few peripherals was that we had all the digital media on hand that we needed to build a web presence for our project - and we had very few bills to pay from the process. We create the Bongo Nation web pages in an inexpensive program called RapidWeaver, tweak the finer detail in Nvu (another free download), then drag-and-drop them to a web server using a simple file transfer application called Vicomsoft FTP Client. On our site you can listen to music from the EP, watch the video clips and look at stills and artwork from the clips, read about the project, look at scans of early notes and charts, listen to recordings of different versions of the Bongo Nation repertoire, or access our NEWS blog where we post pictures from rehearsals and mp3s of new tracks that we are working on. Check it out yourself at http://jazzscore.com/bongonation.
We are also on MySpace at http://www.myspace.com/bongonation, and YouTube – the ‘Diamonds’ clip at http://www.youtube.com/watch?v=7hrty5M2408 and the ‘Good Vibration’ clip at http://www.youtube.com/watch?v=MBTzHFIdvB8. Enjoy!